You’ve received your manuscript back from your editor with markup. It’s time to review all the changes, and the task ahead feels daunting. Is there a way to speed things up a bit?
Setting your displays and creating keyboard shortcuts can make the task of accepting and rejecting changes a lot faster and easier.
WORD DISPLAY
- 1. Set Word to “Show Only Comments and Formatting in Balloons.”
This means that additions and deletions will appear in the body of the text. It is much easier to apprehend changes when they appear in the body of the text rather than appearing offset as balloons.

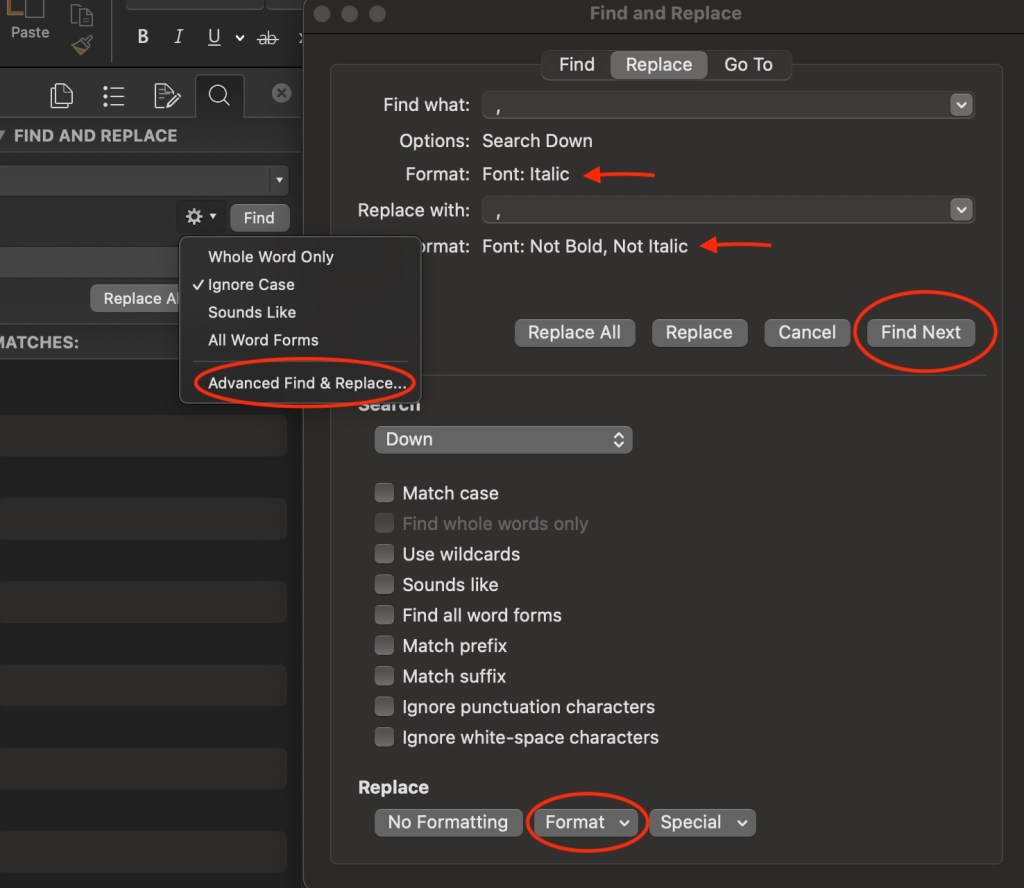
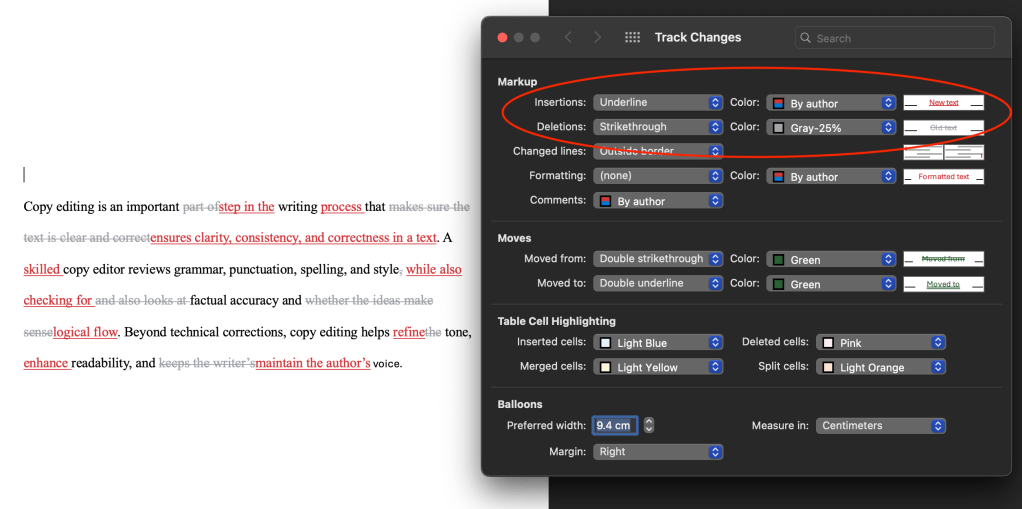
- 2. Set the colours of the markup so that additions visually advance (using a bright colour) and deletions visually recede (using a dull colour).
This reduces competing messages, and it is easier to grasp changes when your eye is drawn to what the text has changed to. Tracking > Markup Options > Preferences…
KEYBOARD SHORTCUTS
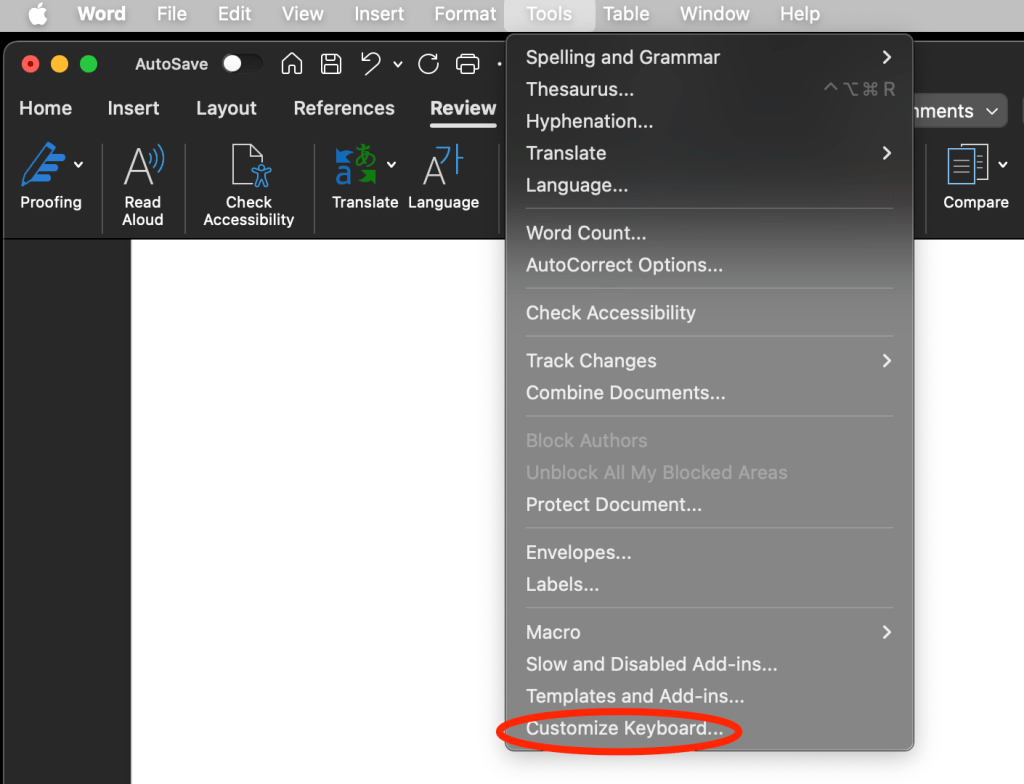
- 1. Create a keyboard shortcut for “Accept Change and Move to Next.”
This will save your hand from performing one million clicks. It also keeps your cursor on the page, making your reviewing process more efficient. Choose your own keyboard shortcut!
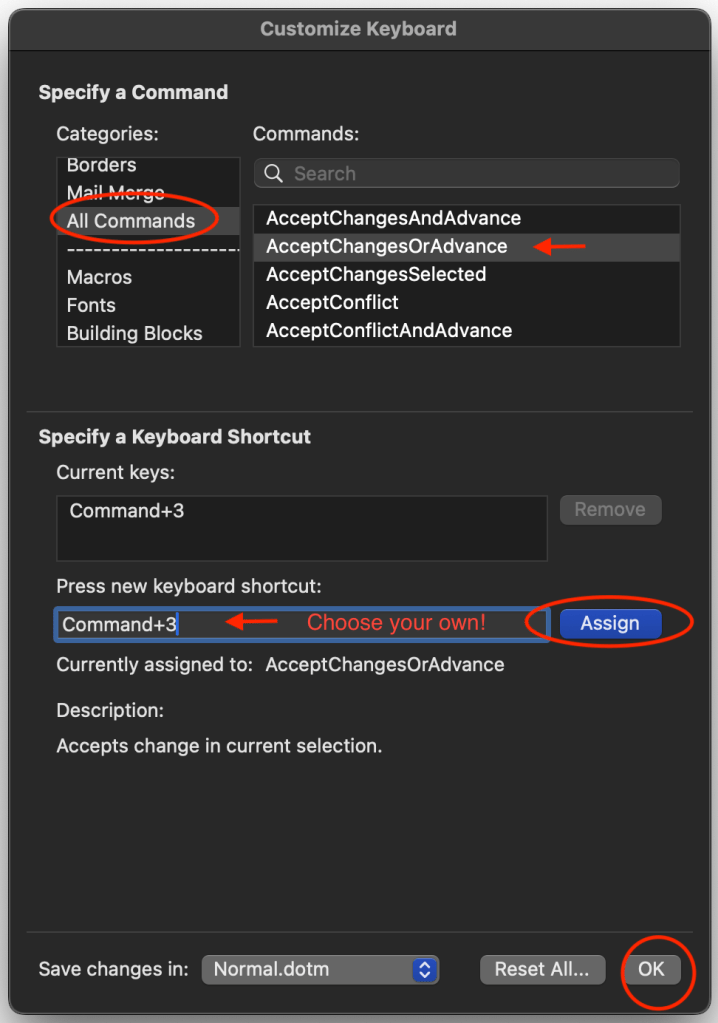
- 2. Similarly, you can create a keyboard shortcut for “Reject Change and Move to Next.”

BONUS: If you want to accept large areas of changes all at once, you can assign a keyboard shortcut to “AcceptChangesSelected.”
I hope this helps make reviewing edits a little less of a headache!
Markup colour tip comes from Geoff Hart’s Effective Onscreen Editing: New Tools for an Old Profession.